Whether you’re developing a 3D environment for a game engine like Unity or Unreal Engine, or rendering architectural visualizations in Blender or Maya, seamless textures are an absolute necessity.
Using raw photos or internet images directly as materials usually results in ugly, repeating visible seams when wrapped over a 3D floor or wall. If you want to know how to make a texture seamless without complex Photoshop clone stamp workflows, our free 4K Seamless Texture Generator — Try Cracked Asphalt allows you to instantly cure these borders straight from your web browser.
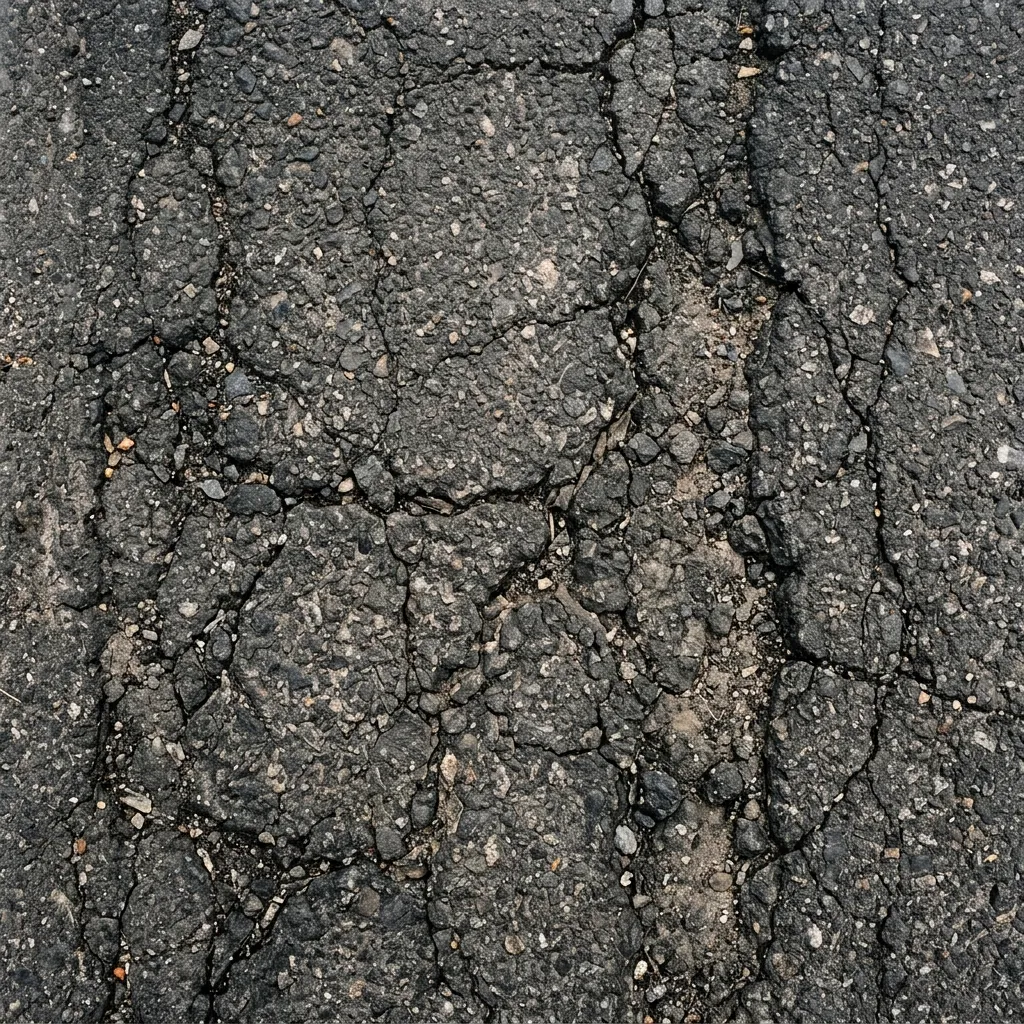
Raw asphalt texture showing hard edges before seamless processing.
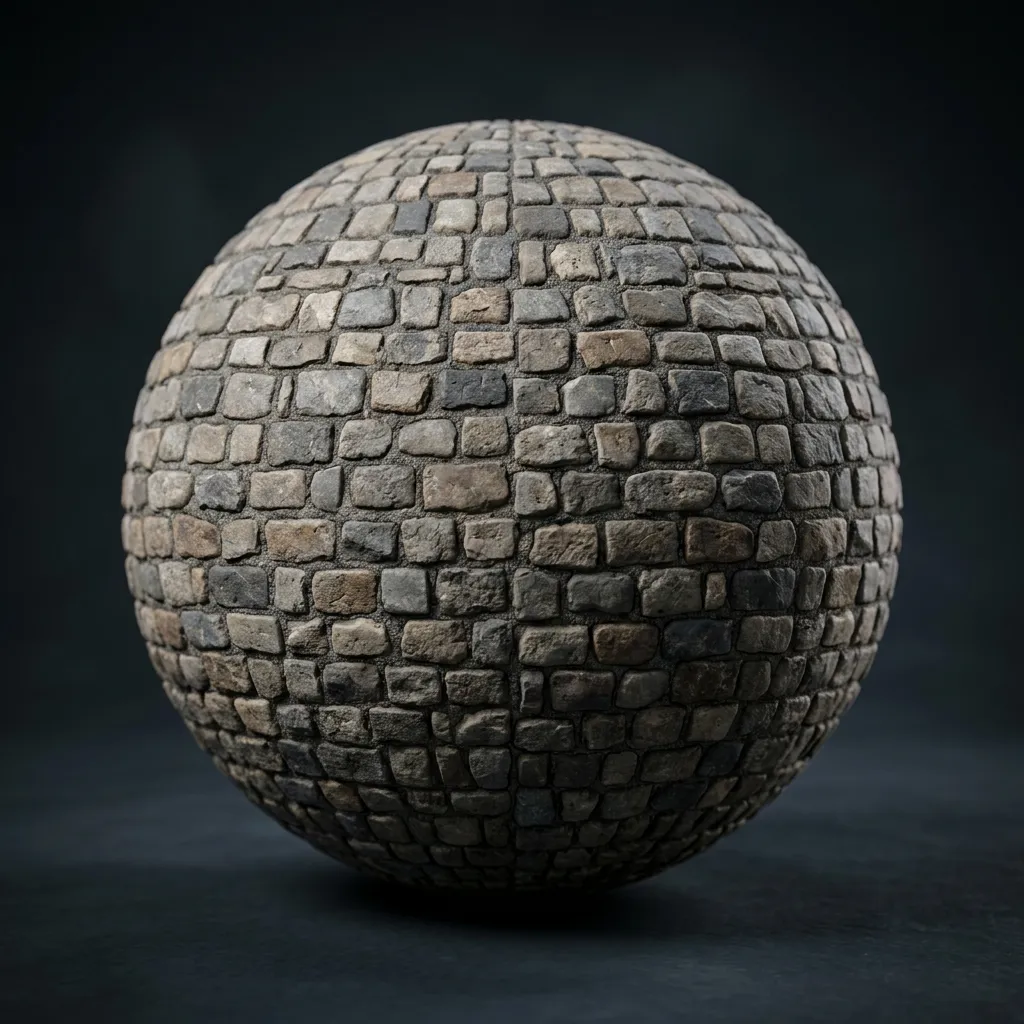
Comparison: Notice how a raw stock photo creates visible grid-like edges (left) while learning how to make a texture seamless allows it to tile continuously with zero visible seams (right).
Why You Need Seamless Textures
A seamless pattern (or tilable texture) allows an image to be placed next to copies of itself without any visible border, edge, or break in the pattern. This lets smaller pixel-resolution images cover infinitely large 3D surfaces like terrains, brick walls, or road asphalt without breaking realism.
Step-by-Step: How to Make a Texture Seamless
Step 1: Upload or AI Generate Your Base Image
Open the Seamless Texture Generator — Try Cobblestone Floor tool. You can either drag and drop a flat photo into the app, or use our built-in AI Generator:
- Click the AI Generate tab.
- Select your AI model. (For the highest quality 3D game assets, we strongly recommend the Nano Banana series models. For quick concept testing, choose Flux or Z-Image-Turbo).
- Enter your prompt (e.g., “seamless cobblestone floor, top down”).
- Click Generate. Once the image is created, click Send to Seamless to pass it to the tiling algorithm.
Step 2: Remove Lighting Gradients (Delight)
If you uploaded a photo taken in real-world sunlight or under room lights, one edge of your image is probably brighter than the other. When tiled, this produces a dark repeating grid. Click the Delight toggle to let the AI balance global illumination and equalize exposure across the entire surface.
Step 3: Inspect the Tiling Preview
In the tool’s 3D viewport, you can preview the active camera mapped onto a simple plane or sphere. To accurately spot repeating patterns:
- Increase the Tiling Scale (U/V) to 4x4 or 8x8.
- Zoom out and look at the entire surface.
- If you see a heavy “stain” repeating every cycle, it means your original photo had an inconsistent light/dark patch. Use the Delight feature to remove it.
Step 4: Add PBR Maps
Once your base diffuse map is seamless, you can instantly convert it into a full PBR workflow by using the same tool to extract a Normal Map, Roughness Map, and Ambient Occlusion Map directly from the new seamless color image.
Step 5: Export 4K Textures
Click Download Texture (or the individual map buttons) to save your brand-new, perfectly tileable 4K or 2K assets.
Material Guides & Seamless Patterns
Explore our material library for detailed seamless texture workflows across different surface types:
- Architectural: Concrete · Cinder Brick · Marble · Terrazzo · Microtopping · Moroccan Stucco
- Surfaces & Terrain: Wood Grain · Brushed Brass Metal · Grass Terrain · Dirt & Sand · Water Caustics
- Textiles & Glass: Rug & Carpet · Knit & Fish Net · Craft Paper · Grey Lacquer · Painted Glass
Ready to generate your own? Try our 4K Seamless Texture Generator Now or extract 3D normal maps with our Online Normal Map Generator.
Related reading: What is a Tileable Texture? · Create Seamless Textures Online · What is a Normal Map? · Roughness Map Guide