
Once you understand the basics of applying a base color in Blender, flat painting quickly feels inadequate for creating realistic, gritty, or highly detailed assets. Real-world objects have complex weathering: dust settles in crevices, edges get scratched, and decals are stamped onto surfaces.
To achieve this level of detail in Blender’s Texture Paint mode, you must move beyond the basic Draw brush and master Stencils, Cavity Masks, and Node-based layering.
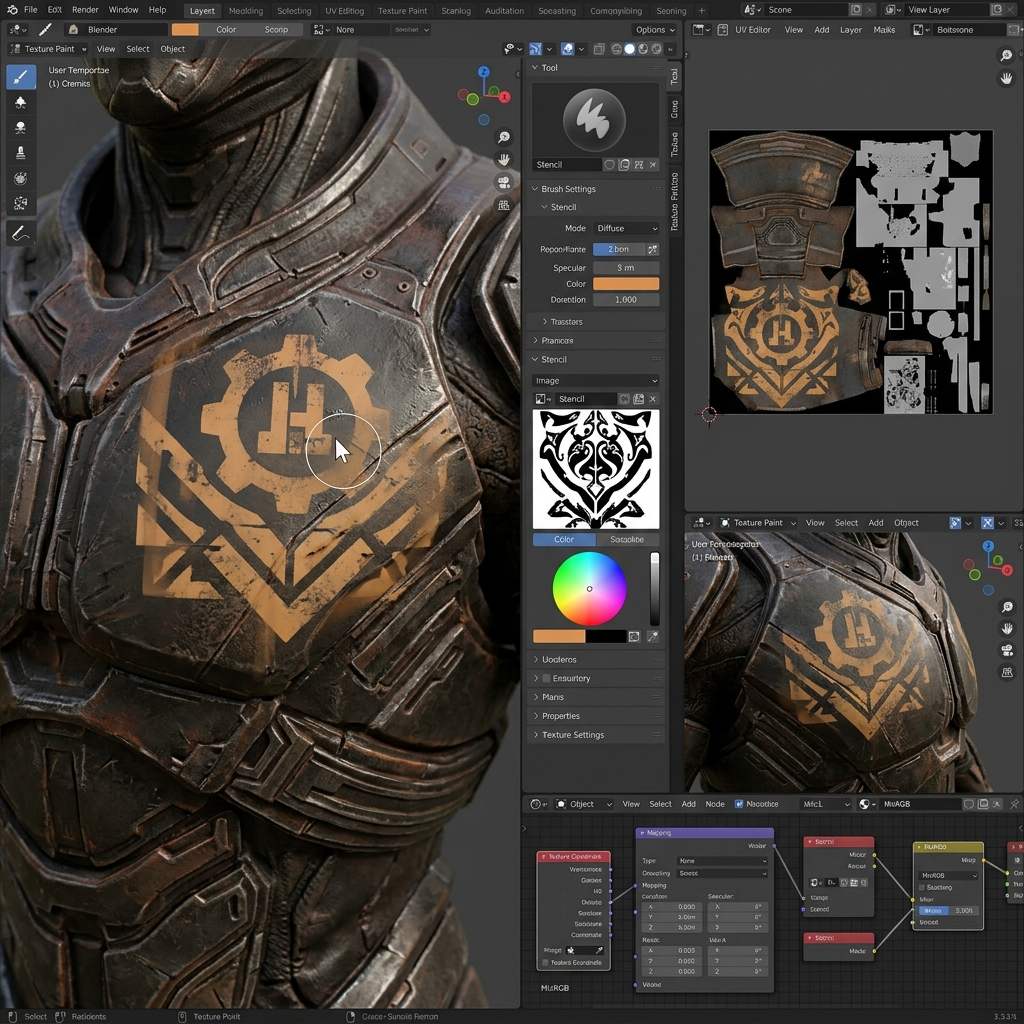 *Using a Stencil map allows you to project complex logos or dirt patterns directly onto the 3D surface without distortion.*
1. Using Stencils for Decals and Dirt
A Stencil acts like a physical transparency sheet hovering between your camera and the 3D model. When you paint over the stencil, Blender projects the image directly onto the mesh beneath it. This is the industry-standard method for applying logos, tattoos, or photorealistic dirt splatters.
Setting Up a Stencil Brush
- In Texture Paint mode, go to the Active Tool panel (
Npanel or Properties window). - Under Texture, click the
Newbutton to create a new brush texture. - Switch to the Texture Properties tab (checkerboard icon) in the Properties window.
- Click Open and load a black-and-white mask image (e.g., a logo or a grunge map) from your hard drive.
- Go back to the Active Tool panel. Look under the Texture settings and change the Mapping from
TiledtoStencil. - An overlay of your image will appear in the 3D viewport.
- Hold
Right-Clickto move the stencil. - Hold
Shift + Right-Clickto scale it. - Hold
Ctrl + Right-Clickto rotate it.
- Hold
- Paint over the stencil to project the design onto your model.
2. Cavity Masking for Edge Wear
When painting weathered metal or old wood, dirt naturally accumulates in the deep crevices, while the sharp exposed edges get worn down and shiny. Blender allows you to automatically mask these areas using the geometry of the model itself.
Enabling the Cavity Mask
- In the Active Tool panel, scroll down to the Falloff or Options section (depending on your Blender 4.x layout).
- Expand the Cavity Mask section and enable it.
- You will see two sliders: Ridge (exposed edges) and Valley (deep crevices).
- If you want to paint rust only in the deep scratches, push the Valley slider up and the Ridge slider down.
- When you brush over the model, the paint will magically ignore the flat surfaces and only apply to the recessed areas.
3. Node-Based Layering
Unlike Photoshop or Substance Painter, Blender’s Texture Paint mode does not have a built-in “Layers” panel. However, you can create a highly flexible layer system using the Shader Editor.
Instead of painting everything destructively onto one image, create multiple Image Texture nodes (e.g., one for Rust, one for Base Metal). Use a Mix Color node to blend them together. You can then create a third, black-and-white Image Texture and plug it into the Factor (Fac) input of the Mix Color node.
By painting on this black-and-white mask image in Texture Paint mode, you can non-destructively reveal or hide the rust layer, exactly like layer masking in Photoshop.
Texture Paint Troubleshooting Table
| Symptom (现象/报错) | Primary Cause (根本原因) | Immediate Solution (快速解决方案) |
|---|---|---|
| Stencil projection looks highly pixelated | Base image resolution too low | Create a new Base Color image canvas at 2048x2048 or 4096x4096 resolution. |
| Paint bleeds onto other parts of the model | UV islands are overlapping | Re-unwrap the model ensuring a margin of at least 0.01 between UV islands. |
| Cavity mask does nothing | Mesh lacks geometry density | Cavity masking requires actual vertices. Add a Subdivision Surface modifier and apply it before painting. |
Generating Complex Alpha Masks
Advanced texture painting relies entirely on having a vast library of high-quality alpha masks, stencils, and grunge maps.
If you need to rapidly generate bespoke grunge maps and PBR textures for your stencil brushes, power up your pipeline with our Free Online Normal Map and PBR Generator — Try Grunge Metal. You can also generate fully tileable dirt layers using our Seamless Texture Generator Online.
Related reading: Blender Texture Paint Guide · How to Draw Texture for Digital Art · Texture Paint Replace Color Blender