
Many 3D beginners find texturing intimidating. You might know how to model a great character or prop, but applying color often feels like a guessing game of dragging nodes. Blender’s built-in Texture Paint tools allow you to bypass complex procedural math and paint directly onto your 3D mesh as if it were a physical canvas.
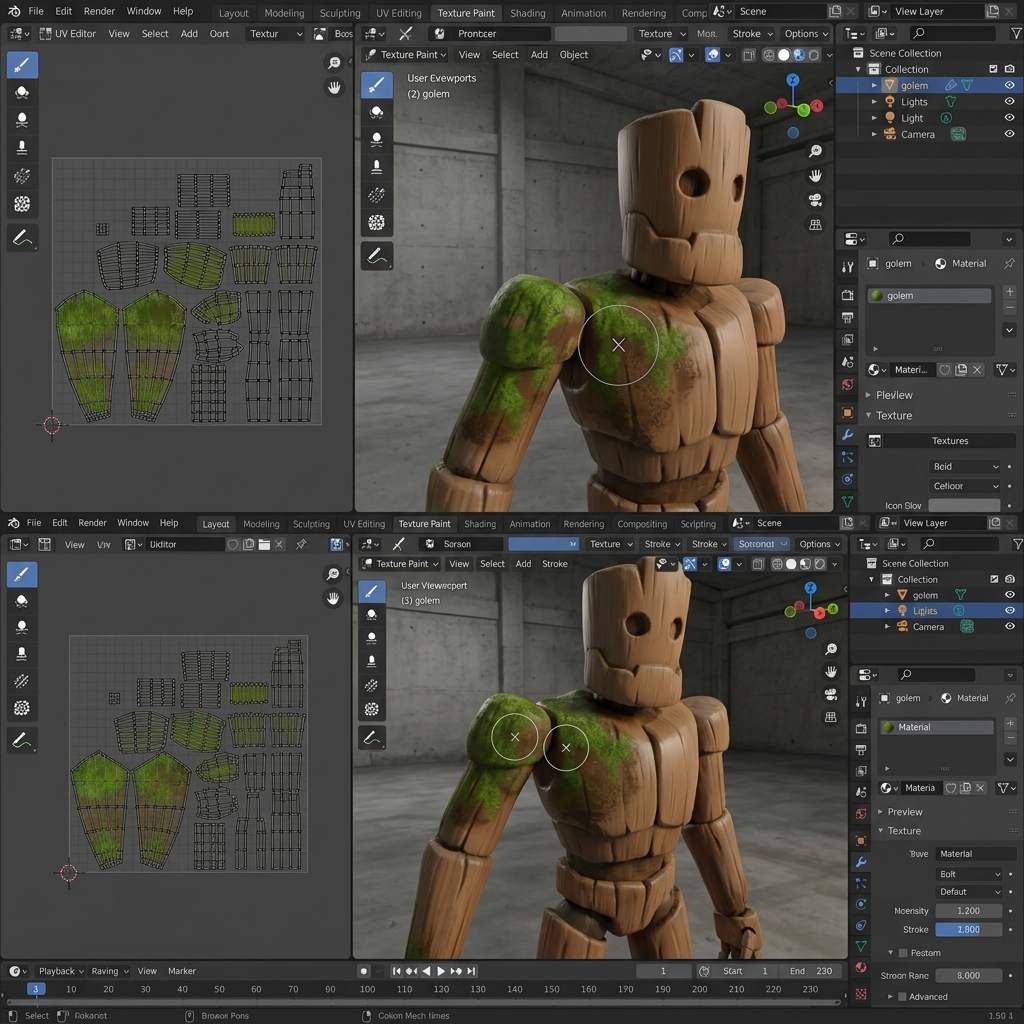 *The Texture Paint workspace splits your view between the 3D viewport and the 2D Image Editor, allowing you to paint on either surface.*
Why Texture Painting Fails to Start
The most common hurdle in Blender texture painting is the setup phase. Unlike dedicated texturing software like Substance Painter, Blender will not automatically prepare your model for painting. If you grab a brush and try to paint on a default cube, you will likely get a “Missing Data” error or simply see no strokes appearing.
To paint on a 3D model, you must fulfill two mandatory requirements:
- The model must have a UV Map (a 2D unwrapped version of the 3D surface).
- The model must have a Material containing a blank Image Texture node to store the brush strokes.
Step-by-Step Texture Paint Setup
Follow this strict workflow to guarantee your brush strokes will register on the model.
1. UV Unwrap Your Model
Before you can paint, Blender needs a 2D canvas to project the paint onto.
- Select your model and press
Tabto enter Edit Mode. - Press
Ato select all faces. - Press
Uto open the UV Mapping menu. - If your model is simple, select Smart UV Project and click OK. For complex models, you will need to manually mark seams and select Unwrap.
2. Create the Base Image Canvas
Now we must create the actual image file that will hold your painted colors.
- Switch your top workspace layout from Layout to Texture Paint.
- In the 3D Viewport on the right, press
Nto open the side panel, and select the Tool tab. - Under the Texture Slots section, change the Mode to Single Image.
- Click the New button to create a blank canvas.
- Name it something logical (e.g.,
Sword_BaseColor). Set the resolution (e.g., 2048 x 2048) and choose a base color. Click OK.
3. Start Painting
You are now ready to paint directly on the mesh.
- Ensure your viewport shading is set to Solid Mode with the color type set to Texture (the drop-down arrow next to the viewport shading spheres).
- Select the Draw brush from the left toolbar.
- Choose a color from the color picker at the top of the screen.
- Click and drag across your 3D model in the viewport. The strokes will instantly appear on the 3D surface and update on the 2D UV map on the left.
Important: Saving Your Painted Image
Blender does not automatically save your painted textures when you save the .blend project file. This is the #1 cause of lost work for beginners.
Whenever you finish painting, look at the Image Editor on the left side of the screen. If the Image menu has a small asterisk (Image*), it means there are unsaved brush strokes.
You must click Image > Save As and save the .png file to your hard drive. If you close Blender without doing this, your painting will be permanently deleted.
Diagnostic Reference Table
If your brush strokes aren’t showing up, check these common errors:
| Symptom (现象/报错) | Primary Cause (根本原因) | Immediate Solution (快速解决方案) |
|---|---|---|
| “Missing Data” error appears | No image assigned to paint on | In the Tool panel > Texture Slots, ensure you have created and selected a New Image. |
| Paint strokes appear stretched or distorted | Bad UV unwrapping | Re-enter Edit Mode, mark logical seams, and re-unwrap the model to relieve stretching. |
| Colors are painting on the wrong side of the model | Flipped Normals | Enter Edit Mode, select all (A), press Shift + N to recalculate normals outside. |
Elevating Your Hand-Painted Textures
Hand-painting flat base colors is great for stylized art, but adding depth requires physical texture.
If you need to rapidly generate stylized normal maps to complement your hand-painted base colors, power up your pipeline with our Free Online Normal Map and PBR Generator — Try Stylized Wood. You can also generate fully tileable retro textures using our Seamless Texture Generator Online.
Related reading: Blender Texture Paint Guide · How to Draw Texture for Digital Art · Texture Paint Replace Color Blender