
Repainting specific hue areas on a 3D model without destroying your underlying texture detail is a common challenge during asset look-development. Whether you need to swap an armor plate from weathered red to industrial yellow or modify a character costume variation, painting over existing RGB pixels with standard solid brushes flattens your shading nuances and creates messy edge bleeding.
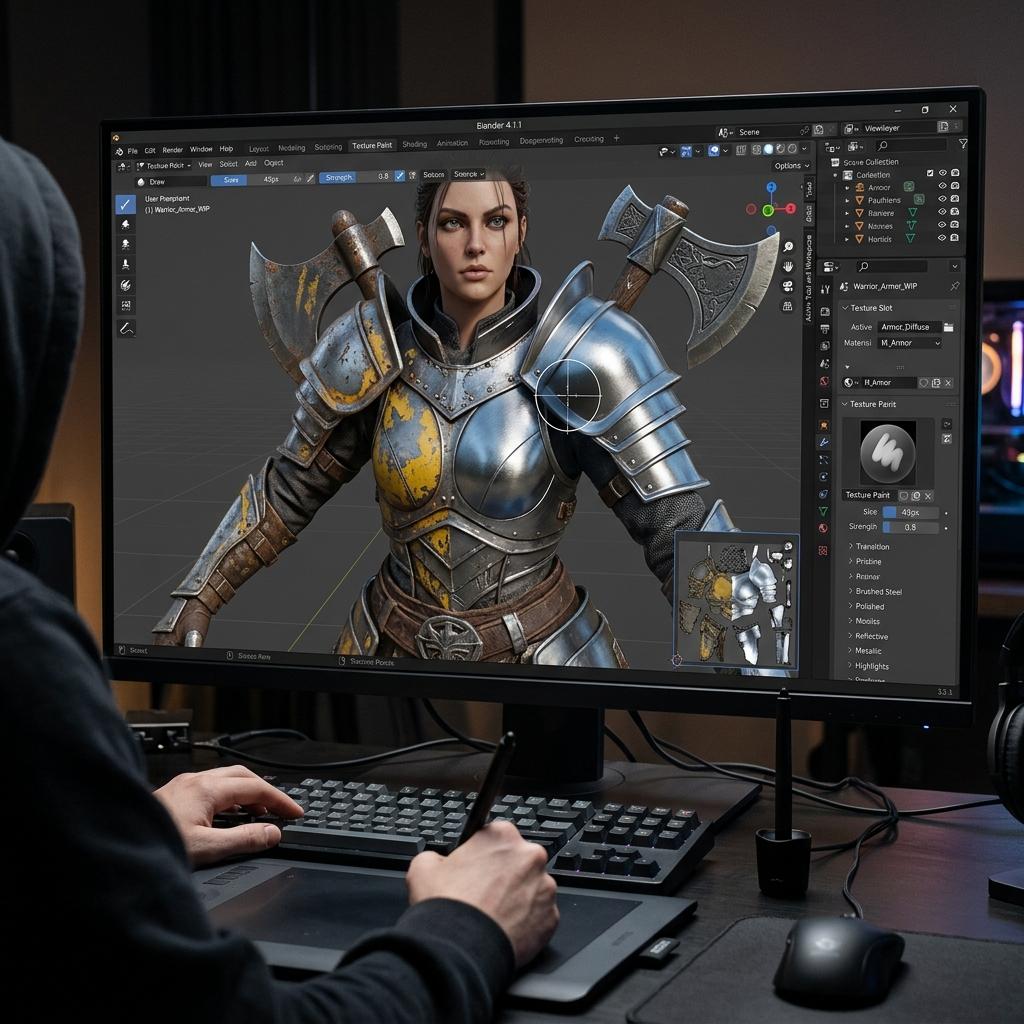
Using correct brush blending modes and selection masks allows artists to swap targeted albedo colors while preserving ambient micro-details and texture fidelity.
Why Standard Painting Flattens PBR Surface Details
When using the default Mix blend mode in Blender’s Texture Paint workspace, every brush stroke replaces both the color hue and the luminance values of the underlying texels. This destroys subtle grime layers, fabric weave noise, and baked ambient occlusion previously painted onto your base albedo map.
To cleanly replace colors while keeping your surface texture intact, you must separate chromaticity from luminosity using specialized brush blending algorithms or color mask nodes.
[Color Replacement Blending Workflow]
Original Albedo Pixel (Red Hue + Dark Grime Detail)
                       │
                       ▼
[Brush Blend Mode Selection]
       ├── Mix Mode      ──> Overwrites Everything (Destroys Grime Noise)
       ├── Hue Mode      ──> Replaces Only Color Angle (Preserves Saturation & Lightness)
       └── Color Mode    ──> Replaces Hue & Saturation (Preserves Luminance Detail)
Step-by-Step: Replacing Colors Using Texture Paint Brushes
1. Set Up Your Brush Blend Mode to Color or Hue
Instead of destructive painting, configure your active Draw brush to alter only chromatic values.
- Switch your 3D Viewport into Texture Paint mode with your target model selected.
- In the top header bar or the Active Tool and Workspace Settings panel (
Nsidebar), locate the Blend dropdown menu (defaulted toMix). - Change the blend mode to Color (replaces both Hue and Saturation while maintaining underlying pixel brightness) or Hue (replaces only color tint).
- Set your brush Strength to
1.0and disable pen pressure on strength for consistent color replacement.
2. Isolate Regions Using Face Selection Masking
Painting freehand across sharp UV boundaries often causes unwanted color spill onto adjacent geometry.
- In Texture Paint mode, click the Paint Mask icon (face selection cube icon) in the viewport header bar.
- Press
Tabbriefly or useLwhile hovering over connected faces to select only the target geometry polygons you wish to recolor. - Paint freely across the viewport; Blender will automatically restrict all strokes strictly to your highlighted polygons.
3. Targeted Recoloring Using Color Ramp and Masking Nodes
For non-destructive procedural replacement across complex assets, perform color replacement inside the Shader Editor before baking your final albedo texture.
- Open the Shader Editor and locate your primary Image Texture node containing the base albedo map.
- Add a Separate Color node (
Shift + A > Converter > Separate Color) set to HSV mode. - Feed the Hue output into a Math node set to Add or Wrap to rotate the hue spectrum numerically, then combine back into an Combine Color HSV node.
Diagnostic Reference Table: Brush Blending Modes for Color Replacement
| Blend Mode | Affected Channels | Best Practical Use Case |
|---|---|---|
| Color | Hue + Saturation | Swapping painted metal or fabric colors while preserving shadow shading |
| Hue | Hue Only | Subtle tint adjustments where original saturation levels must remain identical |
| Multiply | Darkens RGB Values | Adding weathered grease, soot, or darkening deep crevices over existing colors |
| Overlay | High-Contrast Mix | Boosting color punch while simultaneously sharpening surface highlights |
Pro Tip: Maintaining Consistency Across Normal and Roughness Maps
Changing an object’s base albedo color often changes how viewers perceive material roughness. A bright yellow industrial coating visually demands a sharper dielectric specular highlight than a matte oxidized brown surface.
- Always inspect your Roughness Map alongside your recolored Albedo texture.
- If your new color represents a polished factory finish, lower the corresponding roughness channel values to
0.15 - 0.25. - If you introduce custom decals or painted stripes during texture paint replacement, generate matching surface micro-normals so the paint layer has physical thickness.
Transform your repainted base color maps into realistic, multi-channel PBR material sets. Generate Normal and PBR Maps from Your Recolored Albedo — Try Industrial Metal or explore seamless tileable material libraries using our Create a Seamless Fabric or Armor Texture Now.
Related reading: What is a Normal Map? · Roughness Map Guide · Image to Normal Map Converter · Add Ambient Occlusion in Blender