
Ambient Occlusion (AO) is the secret sauce that separates flat, computer-generated 3D models from grounded, tactile assets. While real-time path tracers calculate contact shadows on the fly, game engines and stylized rendering pipelines rely on baking these micro-shadows directly into an image texture.
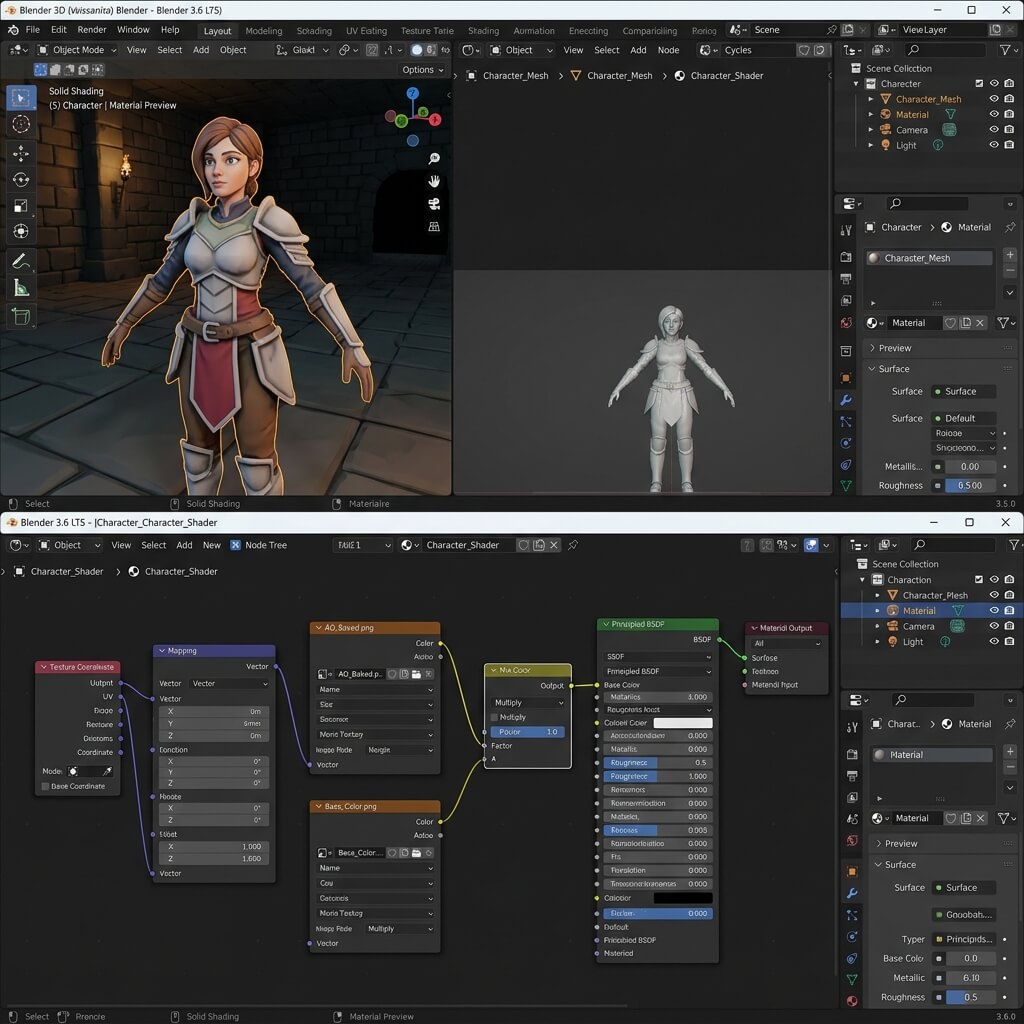
Combining a baked Ambient Occlusion texture with your Albedo map instantly adds depth and contact shadow realism to creases and mechanical seams.
If you are wondering how to add ambient occlusion in Blender as a texture, there are two distinct phases to the workflow: first, baking the geometric occlusion into an image file using Cycles, and second, wiring that baked texture into your material shader.
Phase 1: Baking the AO Map in Cycles
Blender’s Eevee renderer calculates screen-space AO in real-time, but to save it as a permanent texture file, you must use the Cycles path-tracing engine.
Step 1: Prepare Your UVs and Image Target
- Select your 3D model and switch to the UV Editing workspace to ensure your UV islands are cleanly unwrapped without overlapping.
- In the Shader Editor, press
Shift + Aand add a Texture > Image Texture node. - Click the New button on the node. Name your image
Asset_AO, set the dimensions to2048 x 2048(or your target resolution), and uncheck Alpha since AO is a pure grayscale map. - Keep this Image Texture node selected (with a white outline), but leave its outputs completely disconnected.
Step 2: Configure Cycles Bake Settings
- Go to the Render Properties tab on the right sidebar and change the Render Engine to Cycles.
- Expand the Fast GI Approximation or Light Paths panel and ensure your ray bounces are sufficient for smooth shading gradients.
- Scroll down to the Bake panel.
- Change the Bake Type dropdown from Combined to Ambient Occlusion.
- Set the Margin to
16px(or at least4pxfor low-res maps) to prevent edge bleeding when mipmaps scale down in game engines.
Step 3: Hit Bake and Save
- Click the large Bake button.
- Once rendering finishes, switch an editor panel to the Image Editor, select
Asset_AOfrom the dropdown, and immediately go to Image > Save As to save your PNG or TGA file to disk. (Warning: Blender does not automatically save baked images when you close the project!)
Phase 2: Applying the AO Texture in Your Blender Material
Now that you have your Ambient Occlusion saved as a standalone texture file, how do you apply it to your model so it affects your material’s appearance?
In the PBR workflow, Ambient Occlusion represents areas where ambient environmental light cannot easily reach. Therefore, it should darken your Base Color without stripping away specular reflections or metallic properties.
[Blender Shader Node Setup for AO]

(Base Color Texture) ──[Color 1]──┐
                                  ├──> [Mix Color: Multiply] ──> [Principled BSDF: Base Color]
(Baked AO Texture)   ──[Color 2]──┘
The Step-by-Step Node Wiring:
- In the Shader Editor, locate your primary Base Color (Albedo) image texture.
- Press
Shift + Aand add a Color > Mix Color node (in older Blender versions, this is called a MixRGB node). - Drop the Mix Color node directly onto the line connecting your Albedo texture to the Base Color input of your Principled BSDF.
- Change the blending mode dropdown from Mix to Multiply.
- Connect the Color output of your baked
Asset_AOtexture node into input B / Color 2 of the Multiply node. - Set the Color Space of your AO image texture node to Non-Color (since AO data represents linear shading intensity, not sRGB display colors).
- Use the Fac (Factor) slider on the Multiply node to control the intensity of the contact shadows (typically
0.6to0.85yields the most natural result).
Best Practice for Game Assets (ORM / RMA Packing)
If you are exporting this asset to Unity, Unreal Engine 5, or Godot, do not multiply the AO over your diffuse color in Blender! Modern game engines apply AO separately in their shader pipelines to dynamically occlude ambient skybox lighting while leaving direct sunlight unaffected.
Instead, combine your baked AO map into a packed channel texture (often called ORM or RMA):
- Red Channel: Ambient Occlusion (AO Map)
- Green Channel: Roughness Map
- Blue Channel: Metallic Map
Need a clean AO map without setting up complex raycasting scenes in Cycles? Try our Free Online AO and Normal Map Generator — Try Concrete Column — upload any surface image and instantly generate a studio-quality Ambient Occlusion mask and Normal Map in seconds.
Blender AO Bake Settings Quick Reference
| Setting | Recommended Value | Why It Matters |
|---|---|---|
| Render Engine | Cycles | Eevee SSAO cannot be saved as a texture |
| Bake Type | Ambient Occlusion | Isolates contact shadow data only |
| Margin | 16px (2048px map) / 8px (1024px) | Prevents edge bleeding in mipmaps |
| Image Color Space | Non-Color | AO is linear data, not sRGB display |
| Mix Mode (in shader) | Multiply | Darkens base color without affecting speculars |
| Multiply Factor (Fac) | 0.60 to 0.85 | Prevents over-darkening in real-time engines |
More Blender & Shader Tutorials
Enhance your Blender texturing and shader node workflow with our specialized troubleshooting guides:
- Missing UI & Tools: Fix Blender Textures Button Missing Panel
- Baking & Shadows: Fix Blender Textures Turn Black After Baking · Fix Blender Transparent Texture No Shadow Errors
- Color Replacement: Replace Colors in Blender Texture Paint Mode Guide
Related reading: What is an AO Map? · Blender Textures Turn Black After Baking Fix · Roughness Map Guide · Normal Map Fundamentals · Best Normal Map Creator Online