The conversion process: From a flat 2D photograph to a math-driven 3D normal map.
A common hurdle when building 3D environments is having high-quality color photographs (Albedo/Diffuse) without the corresponding maps required for realistic light interaction. A dedicated normal map converter bridges this gap, transforming static color channels into dynamic physical depth.
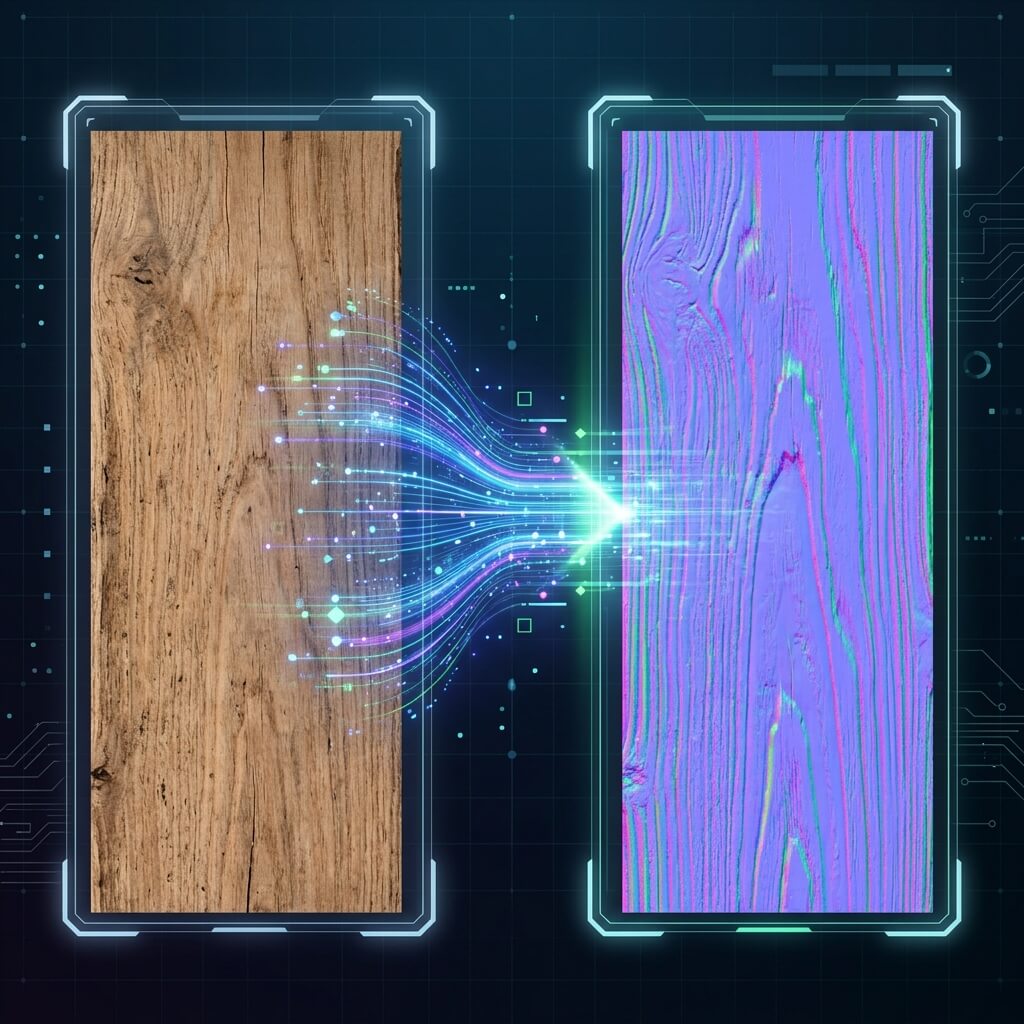
How does an Image to Normal Map Converter work?
Standard photos contain color data and whatever ambient lighting was present when they were taken. However, game engines do not recognize these baked-in shadows as actual geometry.
An image to normal map converter runs contrast analysis over the pixels, calculating slopes based on relative lightness and darkness. It translates these values into tangent-space RGB vectors, producing the familiar purple/blue texture map that shaders use to compute surface slopes.
Input and Output File Formats
Our Online Normal Map Converter supports standard web formats:
- JPG / JPEG photographs and diffuse maps.
- PNG lossless source textures.
- WebP compressed image inputs.
The converter processes these inputs locally on your machine and generates a clean, uncompressed PNG output. This ensures the raw RGB directional vector details are preserved without compression artifacts.
Step-by-Step Conversion Guide
- Upload: Drag your 2D image file into the drop zone.
- Calculate: The tool instantly analyzes the pixel gradients to construct the initial tangent-space vectors.
- Refine: Use the sliders to adjust strength, smoothing, and level depth.
- Export: Download the output
.pngmap and assign it to your shader’s Normal input.
A good normal map converter bridges the gap between raw photography and professional 3D texturing, saving you hours of manual painting and node-graph tweaking. If you are taking your own photos to convert, check out our guide on how to convert pictures and textures to normal maps for essential shooting tips.