Generating PBR maps is only half the battle. To ensure your textures will look physically accurate in your final game engine or 3D render, you need to preview them realistically.
Our Online PBR Material Generator comes with a fully-featured, hardware-accelerated 3D viewport. This guide will show you how to use the built-in tuning controls, change environment reflections (HDRI), and modify UV scales to perfect your textures before hitting download.

1. Tweaking Individual PBR Maps
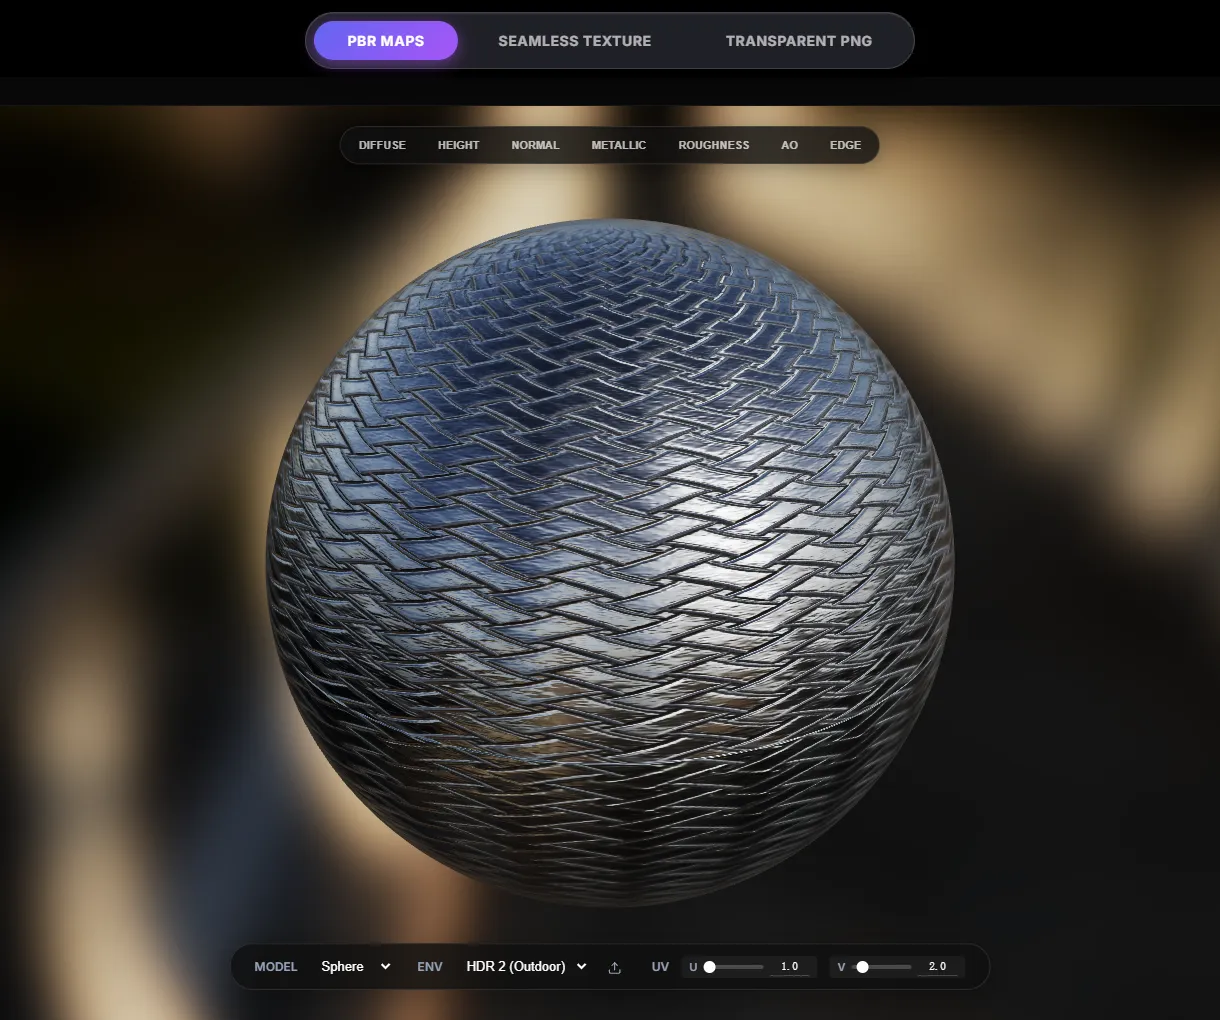
Once your source image has been processed, the system automatically assigns the generated maps (Normal, Roughness, Metallic, AO) to a 3D sphere.
Beneath the interactive 3D viewport, you will notice a row of tuning buttons: DIFFUSE, HEIGHT, NORMAL, METALLIC, ROUGHNESS, AO, EDGE. Clicking any of these buttons will open a micro-adjustment panel to refine that specific map in real-time.
Important Adjustments:
- NORMAL: If the surface bumps look inverted (like indents instead of extrusions), you may need to flip the Y-axis. Some engines (like Unity) use OpenGL (Y+), while others (like Unreal Engine) use DirectX (Y-). Our viewer lets you flip this digitally.
- ROUGHNESS: Use the contrast slider. A high contrast roughness map ensures realistic wet/dry variations, where cracks stay completely dry (rough) and raised surfaces look polished (glossy).
- METALLIC: Is your material rock/wood/plastic? Make sure the metallic value is near
0.0. If it’s metal, tune it towards1.0to activate true environmental reflection.
2. Using Custom HDRI Environments
A material can only look as realistic as the light hitting it. Testing a rough rock under a bright outdoor sun will look entirely different than testing it in a moody, dark studio.
By default, the 3D viewport uses a standard neutral studio lighting HDRI. You can change this to understand how your material reacts dynamically:
- Locate the Env (Environment) dropdown on the right side of the viewport overlay.
- We include default presets: Studio (HDR1), Outdoor (HDR2), and Interior (HDR3).
- Upload Your Own: Select
Custom...and click the upload icon to insert a.hdror.exrfile (for instance, downloaded from an HDRI library). The environment will update seamlessly over WebGL, lighting your material with actual 32-bit light data!
3. Changing 3D Models and UV Scale
Testing on a sphere is great for general material setups, but what if you’re making a wall or a floor?
- Change the Model: Use the Model dropdown to swap the preview mesh instantly between a Sphere, Cube, Plane, or Cylinder.
- Adjust UV Scale: Textures might look too large or overly detailed at a 1:1 scale. Under the UV controls, adjust the
UandVsliders to tile the texture multiple times across the mesh surface. This is critical for testing whether your texture genuinely looks seamless without repetitive visual patterns.
With these built-in preview tools, you’ll never have to download heavy textures just to test them in Blender or Engine. You can refine, flip, contrast, and illuminate everything right within your browser!