
We have all been there: you spend hours cleaning up your topology, meticulously marking UV seams, and setting up your high-to-low poly cage. You switch over to Cycles, hit the Bake button, wait for the progress bar to finish—and your resulting texture is completely, solidly black.
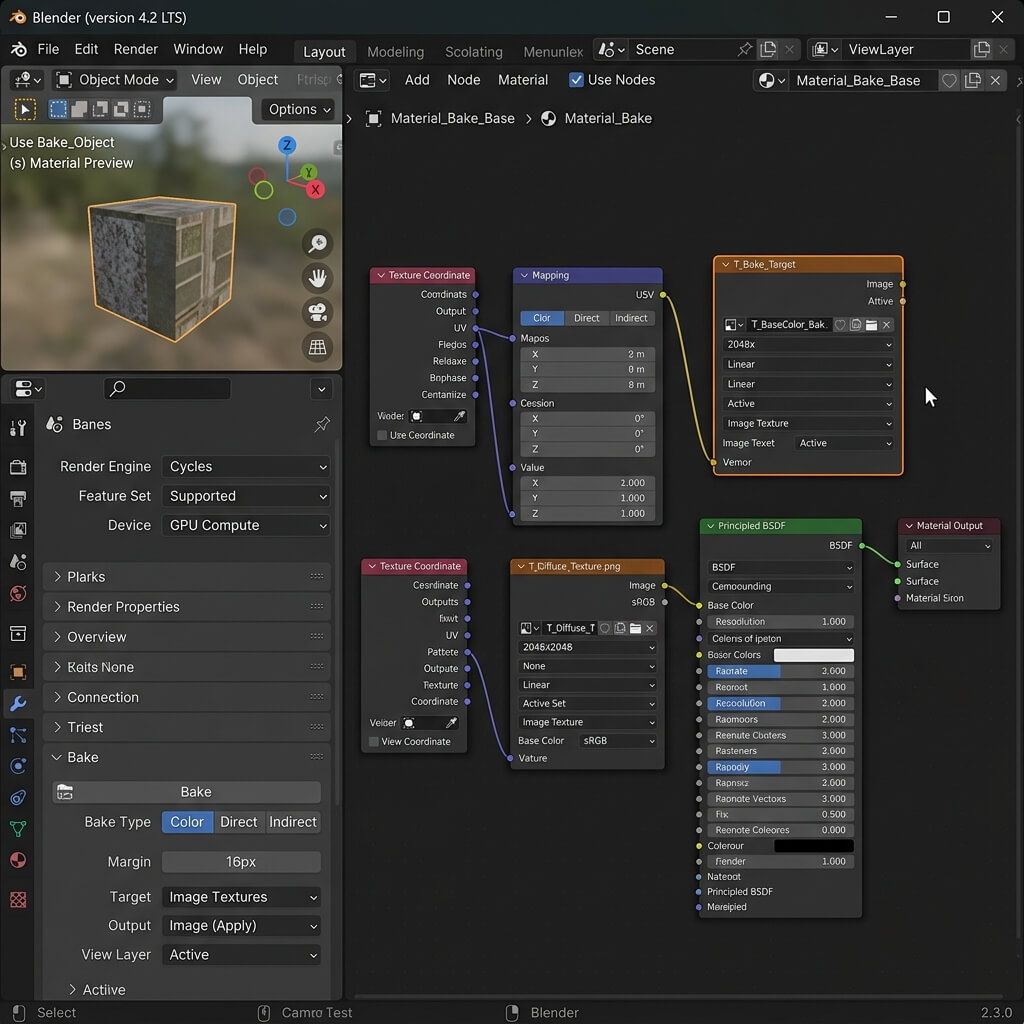
A proper Cycles baking setup requires selecting both the low-poly mesh in the viewport and the target Image Texture node in the Shader Editor.
When textures turn black after baking in Blender, it is almost never a random bug. It is always triggered by one of five specific configuration mismatches in your rendering or shader pipeline. Below is the diagnostic checklist to fix your bake in under two minutes.
1. The Target Image Texture Node Is Not Selected
This is the number one oversight for environment artists both new and experienced. Blender’s Cycles engine does not automatically know which image file in your material you want to bake onto.
How to fix it:
- Open the Shader Editor for your target object’s material.
- Ensure you have an Image Texture node added to the workspace with your blank texture loaded.
- Click on the Image Texture node so it has an active white outline.
- If you have multiple objects selected for a combined bake, make sure every single object’s material has an active, selected Image Texture node pointing to your target map.
[!IMPORTANT] Do not connect the Image Texture node to your Principled BSDF output while baking a Normal or Diffuse map! Leave the node disconnected during the bake, select it, and wire it up only after the bake completes.
2. Ray Distance and Extrusion Are Set to Zero (Selected to Active)
If you are baking detail from a high-poly sculpt onto a low-poly game mesh using the Selected to Active workflow, leaving the ray distance at 0.0m will cause the rendering rays to miss the high-poly surface entirely, resulting in black patches or a completely black map.
How to fix it:
- In the Render Properties tab, scroll down to the Bake panel.
- Check the box for Selected to Active.
- Expand the Output settings and increase the Extrusion value to
0.05mor0.1m(depending on your scene scale). - Set Max Ray Distance to
0.02m. - Remember the selection order in your 3D Viewport: click your High-Poly object first, then
Shift-click your Low-Poly target object last (so it is outlined in bright orange).
3. Normals Are Flipped or Non-Manifold
If your low-poly face normals are pointing inward instead of outward, Cycles will cast rays into the interior of your geometry, returning zero bounce lighting and baking pitch black.
How to fix it:
- Select your model and press
Tabto enter Edit Mode. - Press
Ato select all faces. - Press
Shift + N(or go to Mesh > Normals > Recalculate Outside). - If you have overlapping interior faces or non-manifold geometry, clean them up using Mesh > Clean Up > Merge by Distance.
4. Metallic Value Is Left at 1.0 During a Combined/Diffuse Bake
If you are baking a standard Combined or Diffuse pass and your material’s Principled BSDF has Metallic set to 1.0, your Diffuse color pass will bake completely black. Why? In physically based rendering (PBR), pure metals have no diffuse reflection—their color is derived entirely from specular reflection.
How to fix it:
- If you are baking albedo/color data, temporarily set the Metallic slider on your material to
0.0before hitting bake. - Alternatively, instead of baking a “Combined” pass, bake a Diffuse pass and ensure only the Color contribution box is checked (turn off Direct and Indirect lighting).
5. Overlapping UV Islands or Out-of-Bounds UVs
If your UV map extends outside the standard 0 to 1 UV square, or if multiple UV islands overlap without being intended as mirrored UVs, Blender will overwrite the same pixels repeatedly during the rendering pass, often corrupting the output into black blocks.
How to fix it:
- Open the UV Editor, select all vertices (
A), and go to UV > Pack Islands. - Set the Margin to at least
16px(which equals0.008in the normalized 0–1 UV space on a 2048px texture) to prevent texture bleeding across edge seams.
Summary Diagnostic Table
| Symptom | Primary Cause | Immediate Solution |
|---|---|---|
| Entire image bakes black | Unselected Image Node or 100% Metallic | Select Image Texture node in Shader Editor; set Metallic to 0.0 |
| Black islands / patches | Ray distance too small or inverted normals | Increase Extrusion to 0.05m; run Shift + N to recalculate normals |
| Black seams around edges | Zero UV margin or overlapping UV islands | Repack UVs with a pixel padding margin of at least 16px |
Need to generate high-fidelity surface maps without dealing with complex Cycles raycasting? Convert any texture photograph into Normal, AO, and Roughness maps in seconds using our Free Normal Map Generator — Try Worn Brick Wall.
Related reading: What is a Normal Map? · Ambient Occlusion (AO) Maps Explained · Roughness Map Guide · Image to Normal Map Converter