
UV Mapping is the essential bridge between a 3D model and a 2D texture. If you’ve ever applied a material to a Blender mesh only to see the texture look heavily stretched, skewed, or tiled inappropriately, you are facing a UV mapping error.
Think of a UV map as taking a cardboard box (your 3D model) and cutting it along the edges so it lays perfectly flat on the floor (your 2D image texture). Understanding how to make these “cuts” in Blender is critical for professional texturing.
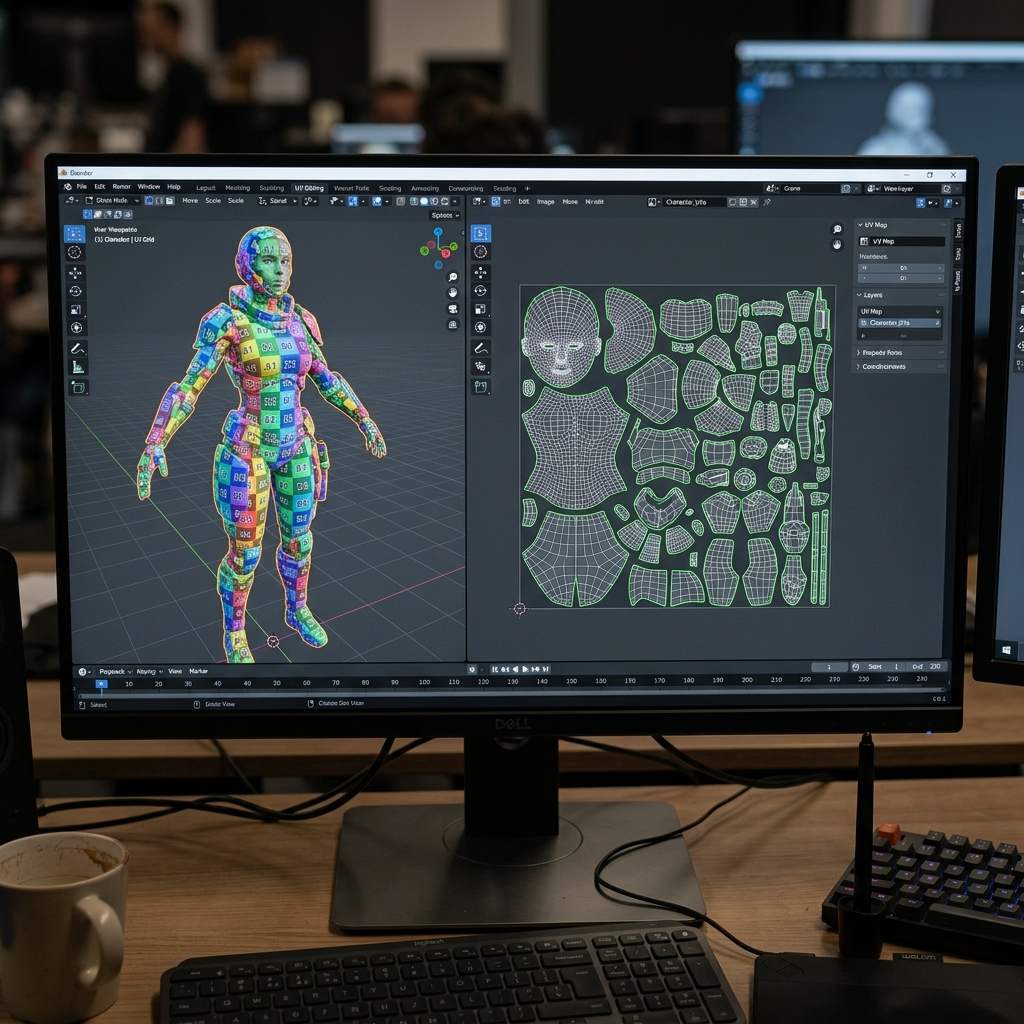 *Applying a UV Checker Map to your mesh is the industry-standard way to visually identify stretching before you begin texture painting.*
The Golden Rules of Seam Placement
In Blender, you define how the model will be unwrapped by marking Seams. A seam tells Blender’s unwrapping algorithm exactly where to “cut” the geometry. If you don’t mark enough seams, the 2D map will stretch violently. If you mark too many, you will have dozens of tiny islands, making painting very difficult.
Follow these rules when marking seams:
- Hide them where the camera won’t look: Place seams on the inside of arms, the bottom of feet, or underneath hair geometry.
- Cut along hard edges: If your model has sharp 90-degree angles (like a mechanical crate), mark seams along those hard edges to prevent distortion.
- Isolate cylindrical shapes: Arms, legs, and gun barrels are cylinders. Cut them off at the base (a circular seam) and add one long seam down the length so they unwrap into a flat rectangle.
Step-by-Step: The Perfect UV Unwrap Workflow
Follow this standard workflow to unwrap any object in Blender.
1. Mark Your Seams
- Select your model and press
Tabto enter Edit Mode. - Press
2to enter Edge Selection mode. Alt + Clickon edge loops where you want to create a cut.- Right-click and choose Mark Seam. The edges will turn thick red.
2. Apply a Checker Map
Before unwrapping, you need a visual guide to check your work.
- Create a new Material for your object.
- In the Shader Editor, add an
Image Texturenode and connect it to the Base Color. - Click New on the Image Texture node. Set the Generated Type from Blank to Color Grid or UV Grid.
- Switch the viewport to Material Preview to see the grid on your model.
3. Unwrap and Adjust
- In Edit Mode, press
Ato select all geometry. - Press
Uand select Unwrap. - Open the UV Editor workspace. You will see your flattened islands.
- Look at the 3D viewport. Are the checkerboard squares perfectly square? If they look like stretched rectangles, your UV map is distorted.
- If you see stretching, go back to step 1, add more seams in the distorted area, and press
U > Unwrapagain.
UV Mapping Diagnostic Reference Table
| Symptom (现象/报错) | Primary Cause (根本原因) | Immediate Solution (快速解决方案) |
|---|---|---|
| Checkers are stretched in one direction | Not enough seams | Add a relief seam along the axis of the stretch to allow the geometry to relax. |
| UV islands are overlapping in the editor | Island margin too small | In the UV Editor, press A to select all, then UV > Pack Islands. Increase the Margin value in the pop-up box. |
| Unwrap looks totally skewed despite good seams | Unapplied object scale | Go to Object Mode, press Ctrl + A and choose Scale before unwrapping again. |
Texturing Your Unwrapped Model
Once your UV map is perfectly flattened with no stretching, you are ready to apply high-quality materials.
If you need to rapidly generate seamless materials to apply to your newly unwrapped architecture or props, power up your pipeline with our Free Online Seamless Texture Generator — Try Checkered Floor. You can also generate complex normal maps for specific details using our Normal Map and PBR Generator Online.
Related reading: Blender Texture Painting Workflow · What is a Tileable Texture? · Make Image Seamless Online