
Creating low-poly assets and Minecraft models in Blockbench relies heavily on crisp, pixel-perfect textures. When you first create a project, you are prompted to set a texture resolution (often 16x16 or 32x32). But what happens halfway through modeling when you realize you need more detail for a specific face, or you need to scale the entire texture map up to 64x64?
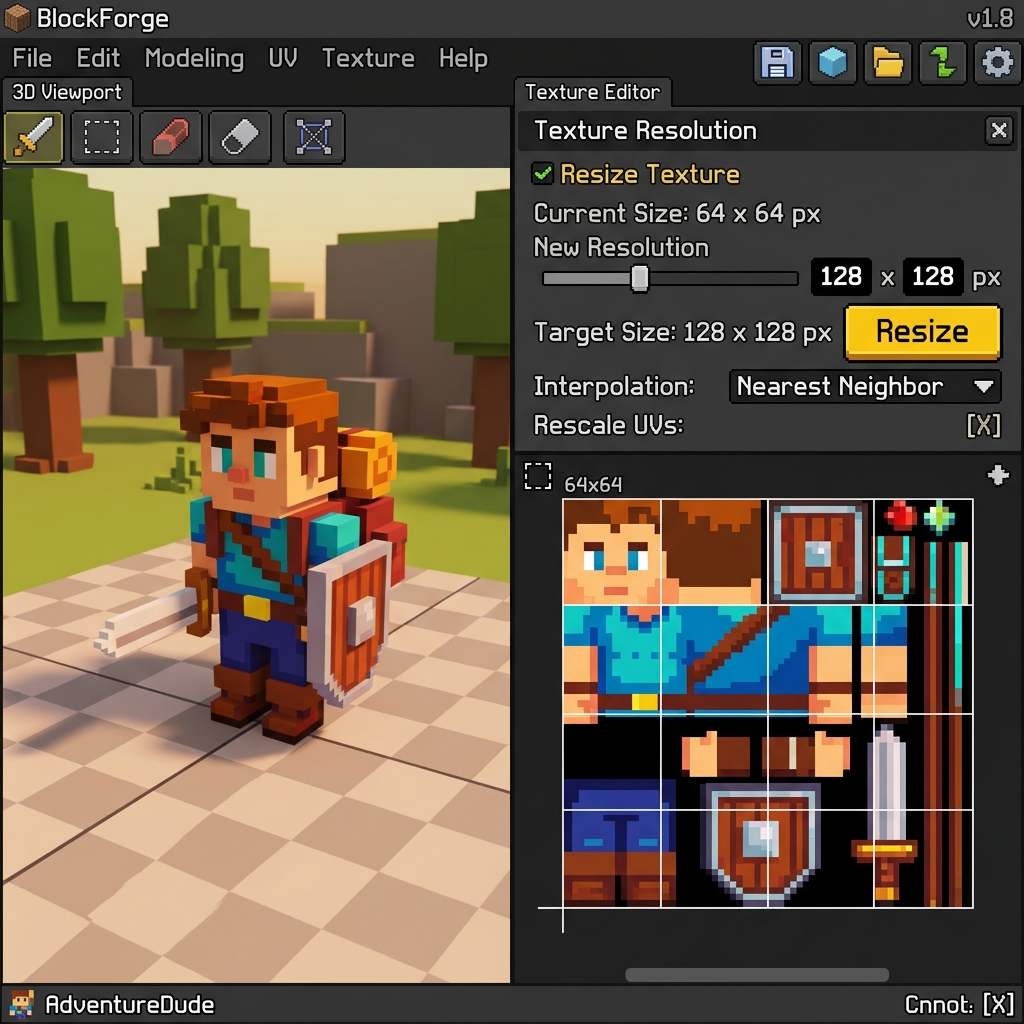 *Resizing a texture in Blockbench requires selecting the correct scaling mode to preserve sharp pixel edges.*
Why Standard Resizing Fails for Pixel Art
If you export your Blockbench texture and resize it in a standard photo editor like Photoshop without changing the interpolation settings, the software will automatically apply “Bilinear” or “Bicubic” smoothing. This attempts to average the colors between pixels, resulting in a blurry, muddy mess that destroys your crisp pixel art aesthetic.
Blockbench has built-in tools to handle resizing properly, ensuring your pixels remain perfectly square and sharp.
Step-by-Step: Resizing Textures in Blockbench
There are two main scenarios when resizing: scaling the entire texture canvas up to allow for more UV space, or increasing the pixel density (resolution) of an existing texture.
1. Changing the Project Resolution (Pixel Density)
If you mapped your model at 16x16 but now want double the pixel density (32x32) across the entire model so you can paint finer details:
- Look at the Textures panel on the left side of the Blockbench interface.
- Right-click on the texture you want to resize.
- Select Resize from the context menu.
- A dialog box will appear showing the current Width and Height.
- Multiply your current dimensions (e.g., change 16x16 to 32x32 or 64x64). Keep the aspect ratio locked.
- Crucially, look at the Scaling Mode or Interpolation option. Ensure it is set to Nearest Neighbor (or simply “Nearest”). This prevents blurring.
- Click Confirm. Your texture is now higher resolution, and you can paint finer details over the existing colors.
2. Expanding the Texture Canvas
If your resolution is fine, but you simply ran out of empty space on the texture map to unwrap new geometry:
- Right-click the texture in the Textures panel and select Resize.
- Increase the Width or Height values.
- Look for the Anchor grid (a 3x3 grid of squares).
- Click the top-left square in the Anchor grid. This tells Blockbench to keep your existing UV layouts locked to the top-left corner and add the new, blank canvas space to the bottom and right.
- Click Confirm. You now have empty space to unwrap new mesh parts.
Texture Diagnostic Reference Table
If your textures look incorrect after resizing, consult this table:
| Symptom (现象/报错) | Primary Cause (根本原因) | Immediate Solution (快速解决方案) |
|---|---|---|
| Texture looks blurry after resize | Wrong interpolation method | Undo, resize again, and ensure interpolation is set to Nearest Neighbor. |
| UV maps shifted or distorted | Canvas resized without anchoring | Undo, resize again, and ensure you clicked the Top-Left Anchor before confirming. |
| Exported model looks blurry in game engine | Engine applying mipmapping | In Unity or Unreal Engine, select the imported texture and change Filter Mode from Bilinear to Point (no filter). |
Elevating Your Low-Poly Materials
While pixel art relies on flat colors, many modern low-poly games (like Valheim) combine retro pixel textures with modern PBR lighting. Adding normal maps to your Blockbench models can make those flat pixels react beautifully to dynamic lights.
If you need to rapidly generate stylized normal maps and PBR textures for your low-poly assets, power up your pipeline with our Free Online Normal Map and PBR Generator — Try Stylized Stone. You can also generate fully tileable retro textures using our Seamless Texture Generator Online.
Related reading: Best Normal Map Creator Online · What is a Tileable Texture? · Convert Albedo to Normal Map