
Few materials expose a 3D artist’s texturing skill quite like leather. Whether modeling a vintage flight jacket, a luxury automobile seat, or a battered fantasy scabbard, relying on flat diffuse coloring produces surfaces that look like cheap painted plastic. The tactile authenticity of real leather comes entirely from its micro-topography—the microscopic hair follicles, stretch wrinkles, and organic grain patterns captured across a dedicated leather normal map.
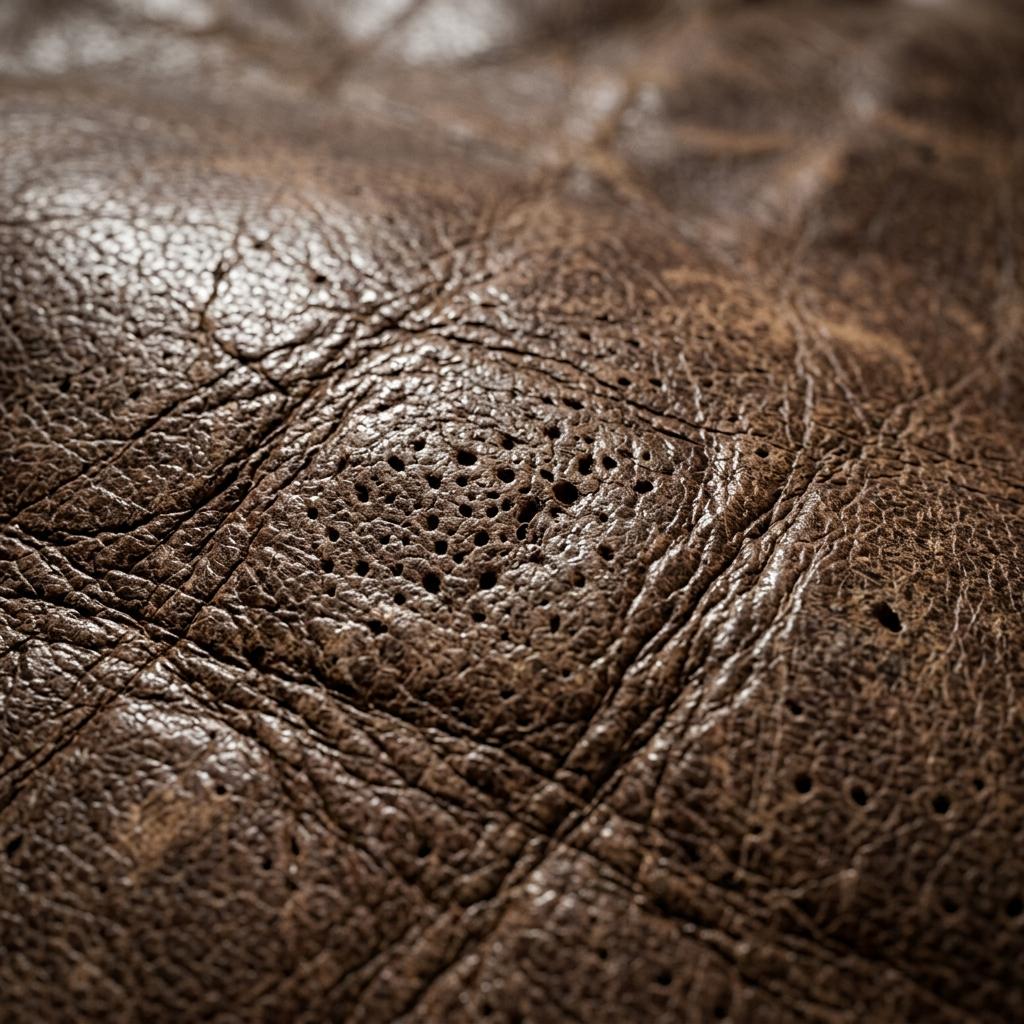
A production-ready leather normal map captures both low-frequency stress wrinkles and high-frequency pore indentations to scatter specular highlights realistically.
However, generating or applying a leather normal map without balancing frequency separation and PBR channel relationships frequently leads to harsh, noisy reflections or bloated, doughy creases. Below is the comprehensive technical guide on how to create, blend, and configure leather normal maps for game engines and offline photorealistic renderers.
Anatomy of Realistic Leather Micro-Geometry
To build an authentic normal map, you must understand how animal hide deforms under physical tanning and stretching. Real leather consists of two distinct physical frequency layers:
- Macro Frequency (Structural Wrinkles and Seams): Broad creases formed by movement, stitching tensions, and folding. These are low-frequency directional reliefs that flow along the mesh topology.
- Micro Frequency (Pore Grain and Follicle Pits): Millions of microscopic indentations distributed organically across the surface. These are high-frequency isotropic features that catch sharp glints of specular light.
[Two-Tier Leather Normal Map Blend Architecture]
Macro Normal Map (Unique UV 0-1) ───────────┐
  └── Deep structural creases and seams     │
                                            ├──> [Reoriented Normal Blend (RNM)] ──> [Shader Normal Input]
Micro Detail Normal (Tiled 8x or 16x) ──────┘
  └── High-frequency follicle pores & grain
If you compress both frequencies into a single baked texture, scaling the material over large furniture or vehicle seats causes visible tiling repetition or pixel blur. Separating macro seams on unique UVs from tileable micro grain produces crisp detail even in first-person camera close-ups.
PBR Parameter Reference Matrix for Leather Types
Realistic leather requires balancing your normal map depth with corresponding roughness and clearcoat parameters:
| Leather Finish Type | Base Color (Albedo) | Roughness Range | Metallic | Clearcoat | Normal Depth (Strength) |
|---|---|---|---|---|---|
| Polished Cordovan (Dress Shoes) | Deep Oxblood / Black | 0.18 - 0.28 | 0.0 | 0.4 - 0.7 | 0.4 - 0.6 (Very Subtle Grain) |
| Full-Grain Cowhide (Furniture) | Warm Saddle Tan / Brown | 0.40 - 0.58 | 0.0 | 0.0 - 0.1 | 0.8 - 1.2 (Deep Natural Creases) |
| Aged / Distressed Bomber Jacket | Desaturated Muddy Brown | 0.55 - 0.80 | 0.0 | 0.0 | 1.2 - 1.5 (Heavy Cracks & Scuffs) |
| Nappa Leather (Luxury Auto) | Slate Grey / Obsidian | 0.30 - 0.42 | 0.0 | 0.1 - 0.2 | 0.5 - 0.7 (Uniform Fine Pebble) |
| Suede / Nubuck (Buffed Leather) | Light Taupe / Camel | 0.85 - 0.98 | 0.0 | 0.0 | 0.3 - 0.5 (Fuzzy Micro-Fibers) |
Step-by-Step Workflow: Configuring Leather Normals in Shader Graphs
To implement a multi-scale leather shader in Blender, Unreal Engine 5, or Unity, follow this three-step node configuration pipeline.
1. Set Up Texture Coordinate Tiling for Micro Detail
- In your Shader Editor, create an Image Texture node for your tileable leather grain normal map.
- Ensure the image’s Color Space is strictly set to Non-Color (or
Linearin Unreal/Unity). - Add a Mapping node connected to a Texture Coordinate node (
UVoutput). - Increase the Mapping node’s Scale parameters (
X: 12.0, Y: 12.0, Z: 1.0). This tiles the microscopic pore texture tightly across your model without consuming additional texture memory.
2. Blend Macro Folds with Micro Pores via Normal Blending
Never blend two normal maps using a standard Mix node set to Overlay or Linear Light; doing so flattens Z-axis unit vectors and causes black shading errors.
- In Blender, route your Macro Normal Map through a Vector > Normal Map node (
Strength: 1.0). - Route your Tiled Micro Normal Map through a second Normal Map node (
Strength: 0.6). - Connect the output of the Macro Normal node into a Vector Math or RNM Blend node cluster to correctly rotate the micro grain vectors along the slopes of the macro creases.
- In Unreal Engine 5, plug both texture samples directly into the BlendAngleCorrectedNormals material function.
3. Modulate Specular Roughness from Normal Cavities
In worn leather, the bottoms of deep creases accumulate dirt and skin oils, making valleys rougher or shinier than the elevated ridges:
- Extract the curvature or green/red channel slopes from your leather normal map.
- Invert the cavity mask and multiply it into your Roughness map input (
Min 0.35, Max 0.65). - If creating polished boots or waxed saddlery, enable the Clearcoat socket (
Value: 0.35) with Clearcoat Roughness set to0.15to simulate a thin protective wax layer floating above the textured grain.
Common Leather Normal Map Diagnostic Checklist
| Issue / Visual Artifact | Root Cause | Immediate Fix |
|---|---|---|
| Leather looks like wet vinyl or plastic wrap | Roughness map uniform and too low (< 0.2) without micro-pore normal breakup | Raise base roughness to 0.45 and increase micro normal strength |
| Grain looks like crushed gravel or concrete | Height-to-normal conversion frequency was set too sharp without Gaussian blur | Apply a 1px - 2px Gaussian blur before baking, or lower Normal Map Strength |
| Creases look inverted under light direction | Normal map exported in DirectX format but rendered in OpenGL viewport (or vice versa) | Invert the Green Channel (Y-axis) in texture import settings |
| Obvious tiling grid visible across large sofa cushions | Micro normal map features high-contrast blemishes that repeat noticeably | Use an AI seamless generator to remove localized hotspots and maintain uniform grain |
Creating High-Fidelity Custom Leather Textures
Hand-painting thousands of leather pores in 2D image software is grueling and rarely achieves natural organic randomness. Using specialized PBR generators allows you to capture authentic animal hide irregularities, subtle dye wear, and edge patina with millimeter-level precision.
If you need to rapidly create production-ready leather normal maps and complete PBR channel sets for props, furniture, or character garments, upgrade your workflow with our Free Online Normal Map and PBR Generator — Try Vintage Leather. You can also generate completely seamless upholstery textures for large modular assets using our Seamless Texture Generator Online.
Leather PBR Material Quick Checklist
- Normal map channels verified (OpenGL Y+ vs DirectX Y-).
- Micro-grain tiled independently from macro wrinkles (
10x - 16xscale). - Metallic set strictly to
0.0(pure dielectric PBR material). - Roughness tuned to target leather finish (
0.35polished to0.70distressed). - Optional Clearcoat enabled for waxed, varnished, or patent leather looks.
Related reading: What is a Normal Map? · Roughness Map Guide · How to Set Up a Normal Map in Blender · Flat Normal Map Color Explained