
Stepping into VRChat with a blank grey 3D model or an uncolored mesh feels like showing up to a costume party in a cardboard box. If you want your character to express real personalities, capture stylized anime aesthetics, or showcase realistic clothing materials, learning how to texture VRChat avatars from scratch is the single most transformative skill in your creation toolbox.
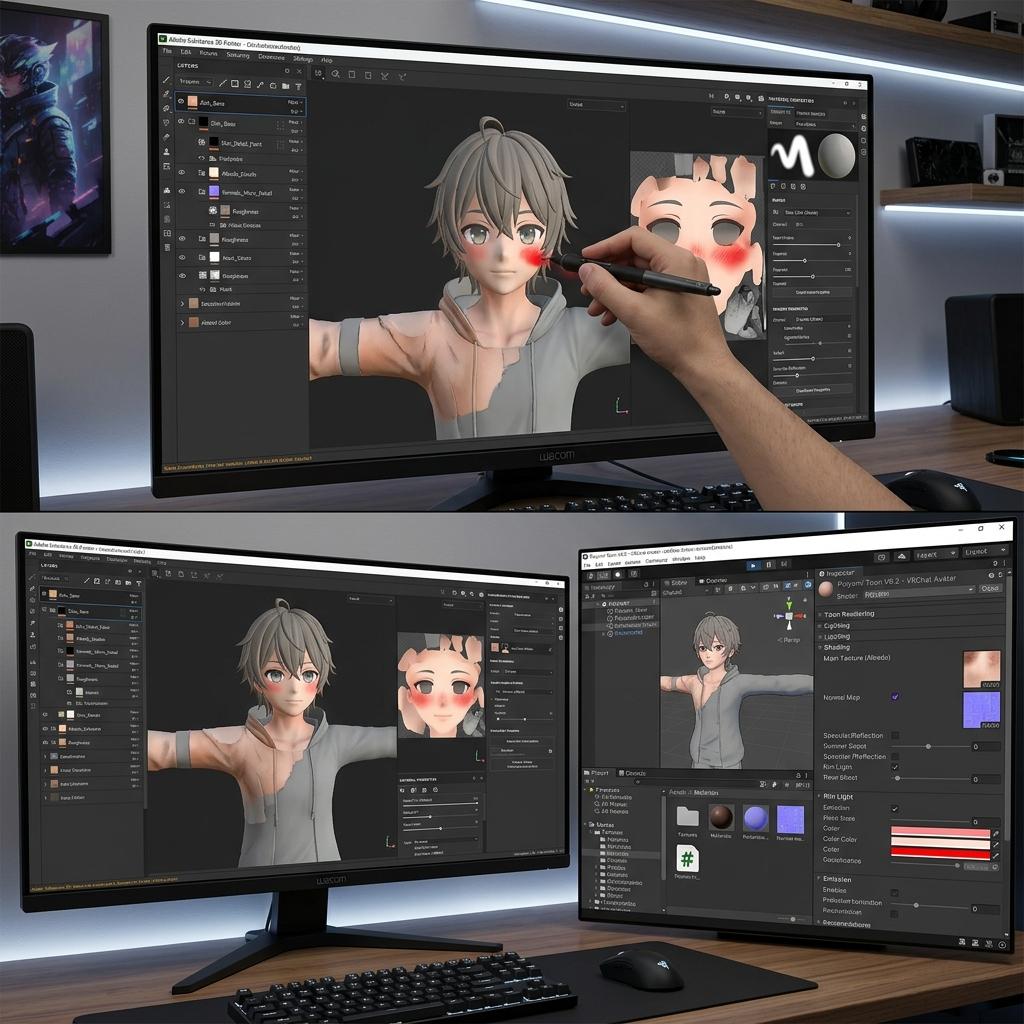
Configuring custom albedo and normal maps inside Unity using the Poiyomi Toon shader allows you to texture your VRChat avatar with professional studio lighting response.
However, texturing a character for social VR is significantly more demanding than painting a standard static illustration. VRChat avatars run across thousands of distinct user platforms—from high-end PC VR rigs to standalone Meta Quest headsets—meaning every texture asset must balance vibrant visual fidelity with strict VRChat performance ranks (Good or Excellent). Below is the complete beginner-to-intermediate technical guide to texturing your VRChat avatar using Unity and modern shader workflows.
Understanding the VRChat Texturing Workflow
Before painting a single brush stroke, it is critical to understand how Unity and VRChat shaders interpret surface information. A fully textured character does not rely on a single image file; instead, it combines several distinct texture layers inside a specialized shader package like Poiyomi Toon, lilToon, or the built-in VRChat Mobile/Toon Lit shader.
Every professional avatar material utilizes four foundational texture channels:
- Albedo / Main Texture (
Base Color): The primary RGB color map defining skin tones, clothing dyes, eye designs, and painted shadows. - Normal Map (
Bump Map): A purple/blue directional vector map that simulates physical micro-geometry, giving clothing seams, fabric weaves, and leather straps 3D depth without adding polygon triangles. - MatCap (
Material Capture): A sphere-projected gradient texture applied over anime models to generate stylized metallic shine, silk sheen, or glossy latex highlights independent of world light direction. - Emission Mask (
Glow Map): A black-and-white or RGB mask dictating which portions of the avatar (such as sci-fi neon lines, glowing eyes, or cybernetic runes) emit self-illuminated light in dark worlds.
[VRChat Avatar Texturing Pipeline]
Source 3D Character Mesh (Blender / FBX)
               │
               ▼
[Step 1: Paint / Export Textures from Substance Painter or Photoshop]
       ├── Base Color Albedo Map (2048x2048 PNG)
       ├── Normal Map Surface Detail (2048x2048 PNG)
       └── Emission / MatCap Shading Masks
               │
               ▼
[Step 2: Unity Asset Import & Compression Optimization]
       ├── Set Max Resolution to 2048 (PC) or 1024 (Quest)
       ├── Enable Normal Map Texture Type for Normal Maps
       └── Apply BC7 / ASTC High Quality Compression
               │
               ▼
[Step 3: Poiyomi / lilToon Shader Configuration & SDK Build]
Step-by-Step Guide to Texturing Your VRChat Avatar
To build an avatar that looks exceptional under dynamic world lighting while staying lightweight for social instances, follow this structured three-phase texturing workflow inside Unity.
1. Preparing Your Character Maps in Blender and Substance
- Open your character model inside Blender (
UV Editingworkspace) and verify that every material zone (Body,Face,Hair,Outfit) possesses a clean, non-overlapping UV layout restricted inside the0 to 1coordinate boundary. - If painting inside Substance 3D Painter, bake your mesh data (
Normal,Ambient Occlusion,Curvature) at2048x2048resolution before creating layers. This enables smart masks to automatically detect clothing crevices and edges. - Export your finished texture sheets as 24-bit PNGs (
Base Color,Normal DirectX/OpenGL,Roughness/Metallic) directly into your Unity project’sAssets/AvatarName/Textures/directory.
2. Importing and Configuring Texture Compression in Unity
- Open your VRChat avatar project inside Unity and locate your imported PNG textures inside the Project asset drawer.
- Click on your exported Normal map (
Outfit_Normal.png). In the Inspector panel on the right, change Texture Type fromDefaultto Normal map and click Apply. (Skipping this step will cause Poiyomi or Unity shaders to render inverted, broken shading!) - Select all your Albedo/Main textures and check their Max Size setting in the Inspector. For PC VR avatars, set Max Size to
2048. For Meta Quest / Android mobile versions, set Max Size to1024to prevent exceeding the10MBtexture memory limit required for greenGoodperformance rankings. - Set Compression to High Quality (BC7 for PC, ASTC 6x6 for Android/Quest) to keep skin gradients smooth while shrinking disk file size.
3. Setting Up the Poiyomi Toon or Standard Shader
- Select your avatar’s body or outfit material in the Project window and ensure the shader dropdown at the top of the Inspector is set to
.poiyomi/Poiyomi Toon(orlilToon). - Expand the Main & Alpha > Main collapsible section. Drag and drop your
Base ColorPNG directly into the Main Texture slot. - Scroll down and expand the Normals section. Drag your imported normal map into the Normal Map slot and adjust the Normal Intensity slider between
0.5and1.2until clothing wrinkles and stitching look well-defined without appearing harsh. - If your outfit features metallic buckles or glossy latex, expand the MatCap section, enable the checkbox, assign a metallic MatCap texture, and dial down Border Strength to
0.3for natural rim reflections.
PBR Parameter Reference Table for VRChat Avatars
| Shader Channel / Property | Recommended Value Setting | Technical & Visual Rationale |
|---|---|---|
Main Texture (Albedo) | sRGB Enabled, Max Size 2048 (PC) / 1024 (Quest) | Preserves accurate skin color tones and keeps total VRChat VRAM footprint optimized |
Normal Map (Bump) | sRGB Disabled, Texture Type Normal map | Linear normal vectors required for GPU lighting calculations; prevents inside-out shadows |
| Normal Intensity | 0.6 to 1.0 (Poiyomi / lilToon) | Keeps fabric weaves and leather stitching grounded without causing dark lighting artifacts |
Culling Mode (Cull) | Off (Double Sided) for Hair/Capes; Back for Skin | Prevents single-sided clothing and hair meshes from rendering invisible from behind |
| Lighting Mode | Flat Lit or Toon Lit with Min Brightness 0.2 | Ensures your avatar remains partially visible and colorful even inside pitch-black VRChat horror worlds |
Generating Custom Fabric Normal Maps for Your Avatar
While repainting flat colors is straightforward, crafting authentic fabric textures—such as coarse knitted wool, embossed leather harnesses, or woven denim—requires generating clean normal and roughness masks. Adding surface normal maps to your VRChat avatar instantly upgrades flat anime clothing into textured, tangible outfits that catch light naturally across every movement.
If you want to create custom fabric normal maps from any pattern illustration or photograph without building complex procedural nodes in Substance Designer, accelerate your creation pipeline with our Free Online Normal Map and PBR Generator — Try Knitted Wool Sweater. You can also generate completely seamless textile patterns for your character hoodies and skirts using our Seamless Texture Generator Online.
VRChat Avatar Texturing Quick Checklist
- All source textures placed cleanly inside
Assets/AvatarName/Textures/. - Normal maps explicitly imported with
Normal mapTexture Type (sRGBdisabled). - PC textures capped at
2048resolution; Quest textures capped at1024(Goodrank compliance). - Shader set to
.poiyomi/Poiyomi ToonorlilToonwithCull Offfor two-sided garments. - Minimum lighting brightness set (
0.15~0.25) to prevent total darkness in unlit worlds.
Related reading: How to Edit VRChat Avatar Textures Like a Pro · Why Adding a Texture Makes Your VRChat Avatar Invisible · What is a Normal Map? · Roughness Map Guide