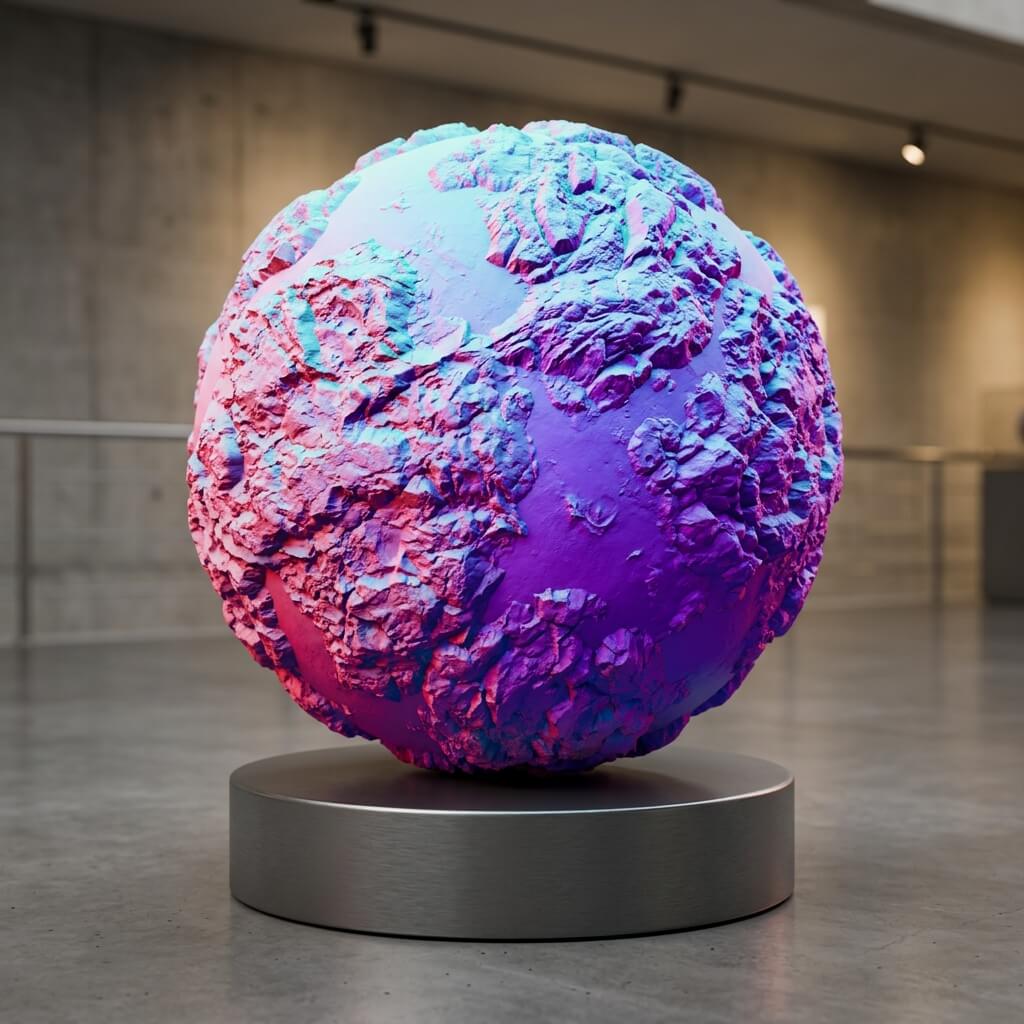
The iconic purple sphere: A visual representation of normal map vectors.
In 3D graphics, Physically Based Rendering (PBR), and game engine workflows, terminology can occasionally get lost in translation—or typoed. One such term frequently appearing in search queries and developer forums is nomalmap.
Did You Mean “Normal Map”?
Yes. Nomalmap is a common typo for Normal Map. Because the “r” key is easily skipped during fast typing, this spelling has become a widely searched query.
Whether written as normal map, normalmap, or nomalmap, they refer to the exact same rendering asset.
Definition: How Normal Maps Work
A Normal Map is a texture mapping technique used to simulate lighting details—such as bumps, scratches, and crevices—without adding geometric complexity (polygons) to a 3D model.
Instead of altering the mesh geometry, a normal map uses RGB color channels to store XYZ directional vectors. When light interacts with a surface, the rendering engine reads these pixel vectors to calculate how light bounces off the object, creating the illusion of high-resolution physical detail on a low-poly mesh.
FAQ: How to Normal Map?
The search query “how to normal map” usually refers to one of two pipelines:
1. Creating the map You can generate a normal map by baking high-poly geometry details onto a low-poly mesh using 3D suites like Blender or ZBrush. Alternatively, if you are starting from a flat 2D image, you can run it through an algorithmic converter like our Free Normal Map Generator to extract depth data from pixel contrast.
2. Implementing it in a shader To “normal map” a 3D mesh inside a game engine, import your map texture and assign it to your material’s dedicated Normal channel. Note: Always disable sRGB gamma correction (set color space to Non-Color or Linear) on import so the engine reads the pixels as pure vector data. For step-by-step implementation, see our guide on how to use normal maps in Unity and UE5.